Momtastrophe or Momtastic

Showing posts with label mom blogs. Show all posts

Thursday, June 21, 2012

Baby Signing Time

Baby Signing Time is fun way to interact with your baby and toddler. The video series teaches ASL sign language and makes communicating with your wee-one easy!

The songs on Baby Signing Time are very catchy and you will find your self singing them throughout the day (my husband and I joke that we are brainwashed because we can't get the songs out of our head). Check out one of my favorites "The Pets I Love"!


My 14 month old son loves watching the videos and has been picking up signs more quickly than when I tried to teach him on my own.

I have been asked "Why teach your child to sign" and my experience this morning was the perfect example:

When we let our dogs out this morning my son signed to me "eat". We went upstairs sat down for breakfast and he ate. This may sound really simple, however had he not know the sign for eat he probably would have gotten fussy and started screaming since he can't yet say that he is hungry. This simple sign allowed us to communicate without a meltdown and most mommies know that is priceless!!!

Tuesday, February 21, 2012

Throw me something mister!


I have a fond place in my heart for New Orleans (I lived there during high school and years later got married there) and I haven't been to Mardi Gras in a many many years, so when my friend Melissa posted a King Cake recipe on facebook that she took years to perfect, I thought I would try to recreate it Gluten Free!

My first attempt below was a big ole #FAIL. The dough was way to sticky and I could barely work with it (The cake tasted great, it just wasn't pretty.)

When my friend Lauren asked me to write a guest post on her blog Whisking Through Life  I knew it had to be something good. So I tried again to make the Gluten Free King Cake....and guess what? It came out great! The photo above was my final result. Check out the recipe and more photos here!

Sunday, February 19, 2012

Margarita Jello Shots

It seems like all of my blog posts about cocktail creations start when I visit with my sister.... This weekend my sister was in town and we wanted to create a fun cocktail creation that would be a wow factor at an upcoming taco night I am hosting. We decided to try Margarita Jello Shots! In order to give them that wow factor we decided to serve them in lime wedges.


1. Gather your ingredients: lime jello, tequila, orange flavored liquor, limes and water
2. Mix your ingredients
I decided to make half batch virgin and half batch 21 and over. So I mixed 1 cup warm water with the jello mix. Once the mix dissolved I poured a half cup of the mix into one bowl and a half cup into another.

For the virgin jello I added a half cup of cold water, mixed and then placed it into the fridge to harden (I decided not to put the virgin jello in the lime shells to be sure I didn't mix it up with the grown-up jello).

For the adult jello I added 2 tequila mini's and half a bottle of the orange liquor mini (the total amount of liquor was half a cup) I mixed it together and set the bowl aside.
 3. Juice your limes (you can reserve the juice for guacamole)
4. Use a spoon to get any remaining pulp out of the lime shell

 5. Pour your jello into the lime shells. Be sure to put them in a pan to keep them from falling over (like the handy bone shaped pan I use to make Barkday Cakes)
6. Refrigerate for several hours or overnight (because of the alcohol these take longer to set than normal)
 7. Cut the lime into wedges (you can add salt just be sure to add the salt as you are serving them because it dissolves quickly on top of the jello)

Be sure to check out my other cocktail creations like Drunk Gummies, White Russian Chocolate Pudding and Watermelon Punch!

*Please note this recipe includes alcohol and is intended only for adults over the age of 21. Please don't eat these and drive, operate heavy machinery or text.


Wednesday, February 15, 2012

America's Favorite Pasttime

Take me out to the ball game...or take my husband's attention away from me for 162 games...

Of course I kid. Who doesn't love baseball season? Now that some stadiums carry gluten free beer, this girl might even want to see a game or two this season!

My hubby is a very talented and funny writer and he will be keeping you in the Fantasy Baseball know this season writing for Thefakebaseball.com under his twitter handle MatzahFazool. You should check out his first article "Don't Pay Good Money for Overpriced Players"

You can also find him writing about what grinds his gears over at the Grilling with Rich website. Hopefully with all of this writing he's doing I'll still be able to find him.

Thursday, February 9, 2012

Get Buns like the Kardashians

I am talking about the buns in their hair! Have you ever wondered how they get such big buns? While they do have a ton of hair, I suspect they are using a foam donut.

1. Put your hair in a ponytail
2. Pull the ends of your hair through the middle of the donut


3. Tuck the ends of your hair around the donut


4. Start to roll the donut towards your head and continue tucking under any loose ends.


5. You are done!

If you do this while your hair is damp you will get awesome curls after you take it out!!

Saturday, February 4, 2012

Easy Peasy Dinner

I have about 30 minutes on weeknights to prepare a nutritious dinner for myself, my hubby and our 9 month old son. With leftover Fake-Out Alfredo sauce on hand I decided to make Skinny Chicken Parm and no bake Lasagna Roll ups.


Skinny Chicken Parm is a piece of cake to make. Rinse off a chicken breast with water and then roll it in Quinoa Flakes. Seer the chicken breast in a frying pan and then transfer to a baking dish with tomato sauce on the bottom. Sprinkle with Parmesan cheese and bake at 350 for 20 minutes.


Sunday, January 29, 2012

Fake-Out Alfredo

If you grew up around yummy southern cooking, like whole milk, or use butter in everything, then this may not be the recipe for you. If you are like me and grew up drinking skim milk and eating 99% fat free ground turkey you may want to try this one out. 

Fake-Out Alfredo has 3 ingredients: 1/2 cup Cottage Cheese, 1 tsp Lemon Juice and Garlic Powder to taste.
Blend all three ingredients together (add in a tbs of milk if you are having trouble getting it to blend)

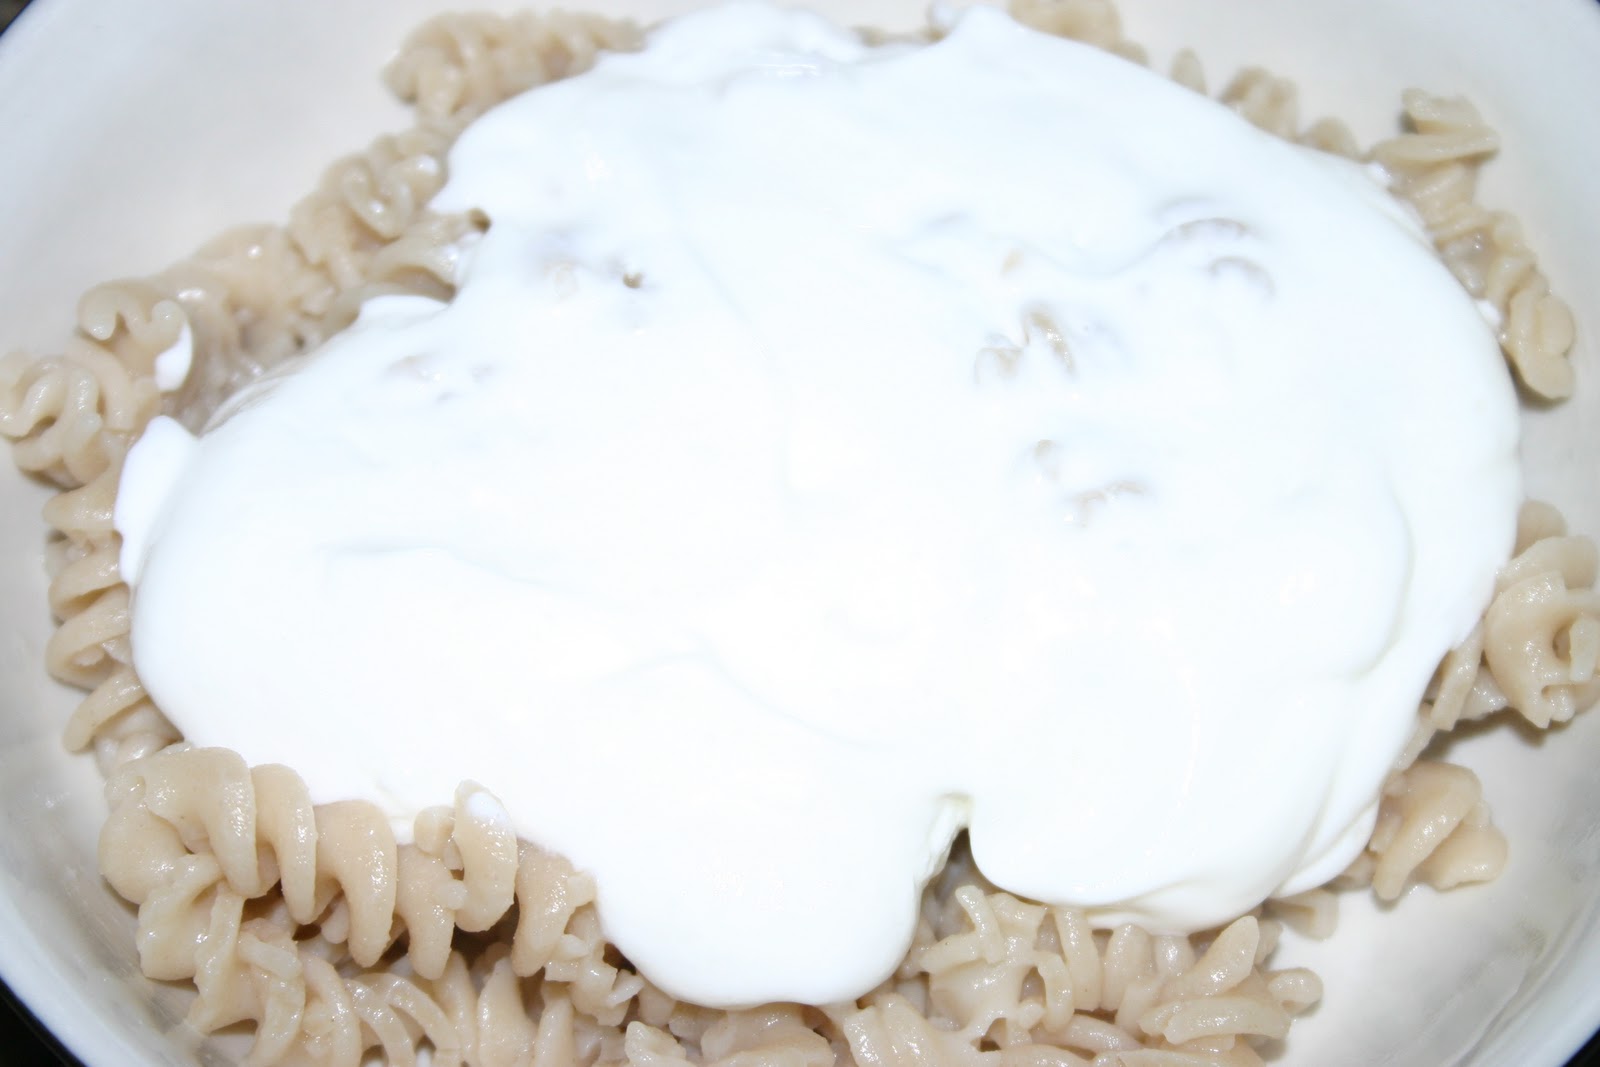
Then serve over pasta. For this recipe I used brown rice pasta. For another recipe with Fake-Out Alfredo check out no bake lasagna roll ups.


Sunday, January 22, 2012

White Russian Chocolate Pudding

With the overwhelming popularity of Drunk Gummies, I thought I might create another adult dessert! I attempted to make Red Wine Rock Candy, the science geek in me thought it would be a ton of fun and nostalgic, but it turned out to be a big fail.

So I give you White Russian Chocolate Pudding:
 Ingredients:
1/2 cup raw sugar
3 tbs unsweetened cocoa powder
1/4 cup cornstarch
1/8 tsp salt
2 1/4 cups milk
1/4 cup Vodka
1/4 cup coffee liquor
1 tsp vanilla extract
 Place all ingredients in a sauce pan and whisk over medium heat until well blended.

 Once the ingredients are well blended turn up the heat to high. Constantly stir the mixture until it begins to thicken and stick to your whisk. Remove from heat.

 Select your favorite martini glass :)


Serve chilled.

You may also want to check out Margarita Jello Shots served in a lime wedge and Watermelon Punch served in a Watermelon!!

*Please note this recipe includes alcohol and is intended only for adults over the age of 21. Please don't eat these and drive, operate heavy machinery or text.


Monday, January 16, 2012

Shoe Redo

I have this super comfy pair of aerosoles that I haven't worn in a long time because the heels look like my dogs used them as a chew toy.


 I saw a great idea on pinterest where someone covered their scuffed up heel in glue and then rolled it in glitter to cover the scuffs. While I was walking through Michael's Craft Store I saw Tulip Fabric Paint in a color close to my shoes! I used painters tape to keep my lines clean.


I painted on three coats allowing an hour drying time between each coat. The photo above shows one coat of paint (notice the scuff marks and tears have already disappeared!) 


The final result! They are not perfect when you look up close, but they look pretty fab on my feet!

Wednesday, January 11, 2012

My 8 month old Peed in the Potty

You read that correctly. My 8 month old peed in the potty! I was recently introduced to the book "The Diaper Free Baby" by Christine Gross-Loh. The book explores Elimination Communication.

My husband who is skeptical of the whole process said "I think you just happened to be in the right place at the right time" and I told him that is the whole point.

The author breaks the book down into a few categories Full Time, Part Time and Occasional EC. Which means you can utilize this method in the time you have available. As a full time working mom I fall under the occasional category. A friend of mine who introduced me to the book (and also has an 8 month old) and is doing this full time has not had to change a poopy diaper in over a week.

What I have learned from the book is:

Get to know your baby and recognize when they need to go to the bathroom. (The book recommends leaving your baby's diaper off or putting them in a cloth diaper so you and your baby know when they are wet) This method doesn't really work for me so I just keep an eye on his diaper to determine what patterns he has. I have realized my son tends to pee after he drinks a bottle. So at that time I give him a pottytunity (as the book calls it)


If you know your baby is going to the bathroom (be it in a diaper, the toilet or on your floor) give them verbal cues. I give my son a psssss sound to associate with peeing. The hope is that eventually if I put him on the toilet and make the sound it will cue him to pee.


A rule I have set for myself is that if he seems frustrated or doesn't want to be on the potty, pick him up and try again at another time. Luckily so far he seems to enjoy sitting on the potty.


Click on the book below for more information:


Monday, January 9, 2012

Lashes by Latisse

Want eye lashes like Kim Kardashian? You can put on fake lashes...or try Latisse!

I have spent years and lots of money trying to find the perfect mascara, but whenever I wanted my lashes to really stand out I always added on fake lashes. When the advertisements for Latisse started a few years ago I was skeptical, but heard from a few people that it worked. So I finally took the plunge and purchased two boxes (about an 8 week supply) and guess what... it works!!! The photo below are my lashes before and then my lashes after 6 weeks using Latisse. I am now just using it a few times a week for maintenance.


Thursday, December 29, 2011

A Spoonful (or 12) of Sugar

I asked Ellen Miller of Isobreathing to give us the scoop on how food and drinks we consider healthy can be deceiving.


Read your labels!


The new year is upon us and many of us make our yearly resolutions to become healthier and lose weight. I was asked to write this article as an eye opener for many. Yes we have been told to read our labels but how many of you are actually doing this. While there are many components to reading labels I am going to focus on sugar for this article. I hope that the references below will help you be more aware before you purchase foods especially if you are feeding young children.


When reading labels do you know what ingredients are actually sugar?


Look for: malt, sorghum, sucrose, fructose, maltose, glucose, dextrose, high fructose corn syrup, maple, brown sugar, powered sugar, brown rice syrup, cane juice.


or sugar alcohols: mannitol, sorbitol, xylitol


Look there's sugar in my yogurt: A great article on how much sugar is in yogurt. We typically think of yogurt as a healthy option. The photo above shows 8 teaspoons!


Remember every 4 grams is equal to 1 teaspoon.


More Sugar Shockers:

Apple cider 81 grams (20 teaspoons),

Instant coffee with sugar cappuccino flavored 64 grams (16 teaspoons),

Fruit punch powdered mix 95 grams ( 23 teaspoons)

Sweet tea 95 grams,

Grape juice frozen concentrate sweetened 36 grams

Salad dressing for coleslaw reduced fat 38.4 grams

Canned fruit 77 grams

Dried cranberries sweetened 62.6 grams,

Carmel popcorn 64 grams,

Banana chips 25.7 grams

Granola bars oats fruits and nut 40 grams


Upon checking WebMD I found:

SoBe Energy or Elixir: 16 ounces = 52-54 grams sugar, 200-220 calories

SoBe Green Tea: 16 ounces = 50 grams sugar, 200 calories

Snapple Iced Tea, Peach, Lemon, or Raspberry: 16 ounces = 46-50 grams sugar, 200 calories

Arizona Iced Tea: 16 ounces = 48 grams sugar, 180 calories

Snapple Antioxidant Water, Agave Melon: 20 ounce bottle = 32 grams sugar, 140 calories

Glaceau Vitamin Water: 20 ounce bottle = 32 grams sugar, 125 calories

Gatorade Bring It, Shine On, or Be Tough: 16 ounces = 28 grams sugar, 100 calories

Instant Cocoa: You’d probably expect hot cocoa mix to have cocoa, or maybe powdered milk, highest on its list of ingredients. But for Swiss Miss Mocha Cappuccino and Marshmallow flavors, the first and second ingredients are sugar and corn syrup, with cocoa listed as the fourth ingredient.


Swiss Miss Mocha Cappuccino or Marshmallow flavors: 1 envelope made with 6 ounces water = 19 grams sugar, 120 calories


What can you do?

Read your labels, keep an eye out for the sneaky sugars and choose products without added sugar.

Make your own, to enjoy yogurt without the added sugar, make your own flavored yogurt starting with Greek Yogurt (it has 4.5g sugar per half cup and it is not from added sugars, but the sugar found naturally in the milk) and add in fruit.

Drink more Water, Hydration is very important in overall health and wellness add in a slice of lemon or lime to give your water flavor and save yourself the calories of the drinks listed above.

Friday, December 16, 2011

Decoding your DSLR Camera

One of my New Year Resolutions is to figure out how to use more than just the auto setting on my DSLR. I turned to my good friend and fellow April Mommy Cassie Sperling of Studio None Photography, located in San Diego, CA for help. (She is also famous and was recently on the Dr. Oz show which is super cool)


Guest Blogger Cassie Sperling:
So, you have this really cool DSLR camera, but you don't know how to use it outside of the auto mode. You find yourself playing around with it, but then realize, you can't take a photo in the dark. "I paid all this money for a nice camera and it won't take a picture in the dark..." That was me not too long ago. I purchased my first DSLR in 2008 and have taught myself, without any courses, how to take better photos.
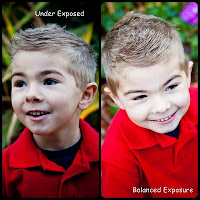
Exposure is your best friend in the photography world. Literally, just like your best friend, you find the exposure is sometimes way too bright for your liking, or too dark. Like your friendships, there needs to be a balance. Looking through your viewfinder (through the eye piece), you will see a meter on the bottom that lights up. Your goal here is to place the bar in the center of the meter to capture the best exposed photo. You can get creative with this feature if you want to purposefully over or under expose a photo.


"How do I get that bar to move?" you ask. There are a couple of ways to move that bar. ISO speed, shutter speed, and your f stop (or aperture), will help you create the perfect photo. Low light situations call for a higher ISO speed. The higher your ISO, the more light is let into your lens. Remember what I said about balance? High ISO speeds produce a lot of noise in your photos (the grainy pixels), so make adjustments with your f stop and shutter speed to create a nice balance. If you have editing software, such as Adobe Lightroom, you can reduce the noise in your photos and won't have to worry as much about a higher ISO speed. If you do not have editing software, play around with your settings, get them on the computer ASAP so you can get instant feedback and make adjustments in the future.


Your shutter speed works in the opposite direction as compared to the ISO. The higher the fraction on your shutter speed, the faster the shutter opens and closes, and the less light is allowed in through the lens. Sharp photos are produced with a faster shutter speed to reduce camera shake and to increase image stability. In combination with the ISO, your exposure is almost set.


You are in love with the photos that focus in on a subject, but are nice and blurry in the background, but how do you take that photo? (note from Mrs. Alexandria, I have always wondered this I am so excited to finally have the answer) The f stop, or aperture, determines the blur of the background, as well as how much light can be let into the lens. A low number for your f stop, such as 4.0, allows the lens to bring in more light to the camera. I always start out setting up the f stop to produce the image I am trying to capture, then I adjust the ISO speed and shutter speed.


Now that you are balanced, what are we missing? Our subject! The most important aspect of your photo. Kids are the perfect subject to test out your photography skills. With their fast action, they keep you on your toes, and will keep you adjusting your settings on your DSLR.


I have found, if you want a child to cooperate with you to get the perfect shot, start out by getting down on their level. Less intimidation is key...well, that and bribes too. Play with the angles as you capture your images; at the same time, interact with the kid. Sometimes it is hard to forget they are just sitting there building up large amounts of energy. Try some photos from up high, down low, to the side, from behind, or even straight on. Practice will make you a better photographer and it will also help you develop your own style. Remember, the more photos you take, the more you can learn about your camera, its settings, and your own style. Go grab your DSLR and start playing!


Be sure to follow Cassie on Facebook or send her an email if you have any questions studiononephotography@gmail.com

Thursday, December 15, 2011

Free Dog Treats!

In honor of my best furry friend Remy turning 10 this month I will be giving away a free bag of Remy Ribbons with each dog treat order at Aunt Sasha's Barked Goods! Give the gift of love to your best friend this holiday season with all-natural doggie treats. My dogs give them 2 paws up!


Tuesday, December 13, 2011

Pinterest Project: Crayon Art


I found another fun project idea on pinterest, crayon art! It looked like a simple enough project, attach crayons to canvas and melt with a hair dryer or put crayons through a glue gun and melt. Above you can see the first method which my sister created this weekend (The top photo she placed pieces of crayon on the canvas which was laid flat and the hair dryer was held above the canvas and the second the canvas was upright to allow the crayon to melt downward). I decided to use the glue gun approach (I only splattered a little across my face, ouch!)


First I went online and googled silhouette stickers. I found a few I liked and printed them out. I then cut them out and traced them onto my canvas. I then filled in the picture with a black fabric marker.


Next, I covered my drawing with cardboard and painters tape.


I set my up my project in a cardboard box and used a blank canvas to test out how the melted crayon was going to flow.


The melted crayon came out in splatters, drips and runs, there really was not much consistency to it. I had to use a pencil behind each crayon to help push the crayon through. As you can see in the picture the process got a little messy (thank goodness it mostly stayed contained in the cardboard box)


Here is my final result!


Pin It